The plate carrier is a modular tactical vest with numerous customisation options. Originally designed for military and law enforcement, they have become extremely popular amongst survivalists, home defenders and gun enthusiasts around the world. Having worn many plate carriers over the years, I’d like to share my favourite and most practical setups, along with some tips and tricks that you may find useful. So let’s start off by answering this: why do you need a plate carrier, and what is the best setup?
The plate carrier is effectively your priority equipment piece during combat; it has the ability to protect you from small arms fire and other violent threats, while proving endless attachment points for mission critical gear. As for the ideal setup, this is a difficult question to answer as there are many ways in which a plate carrier can be arranged. It all comes down to a combination of personal preference, your role, and the environment in which you intend on operating.
The setup which I will discuss below is going to be aimed primarily towards individual use. In other words, if you are looking at plate carrier systems for rural or urban home defence, survival preparation, or close protection, then this article is for you.
What Will You Carry?
While it might seem to be common sense, a plate carrier is designed to be used in conjunction with armoured plates, hence the name “plate carrier”. So first off is plates; your vest should be equipped with ballistic plates or at least soft armour as a minimum. We will discuss this in more detail shortly, but if plates are neglected and the system is used only for load carrying, it is likely that correct fitment will be difficult and the carrier may slump or hang down in certain areas.
Your plate carrier and belt order should bear your mission critical gear. This is gear that is considered vital or critical to achieve your mission. But, it must be kept to a minimum and over-complication must be avoided where possible.

When it comes to survival and defence against a violent threat, you may consider the following gear to be considered mission critical.
| MISSION CRITICAL GEAR |
| Ballistic Plates and/or Kevlar Soft Armour |
| Primary Weapon System (Rifle, Shotgun, etc) |
| Spare Magazines for your Primary Weapon System |
| Individual First Aid Kit (IFAK), including Tourniquets |
| Sidearm & Spare Magazines |
| Communications (Mobile Phone and HAM Radio) |
| Knife or Multitool |
| Flashlight |
| Hydration (water) |
As we can see by the list above, there is a fair amount of kit that needs to be securely attached to your person during a bug-out or response scenario. Adding all of this gear to a plate carrier is nowadays an outmoded method; it quickly becomes bulky and cumbersome. My recommendation is to rather spread the load between a plate carrier and a battle belt (or tactical/range belt). A couple of examples can be seen below.


The following article provides some real useful tips and tricks on battle belt setup: The Battle Belt – Your Mission Critical Belt Setup.
Ballistic Plates vs. Kevlar: Which System Is Right For You?
Soft Armour
Kevlar, otherwise referred to as soft armour, is a heat-resistant and very strong woven synthetic fibre that – when layered up – is capable of absorbing incredible amounts of kinetic energy and stopping many small arms threats found in common pistol calibers. The fabric is light-weight and flexible, and can be anywhere from five to ten times stronger than steel.
Level IIIA is the most widely used soft armour today, and when used alone, is capable of stopping the majority of pistol and shotgun bullets. It is important to understand however that soft armour is not a suitable means of defence against rifle cartridges.
If your preparation is against threats of knives, pistols and shotguns, then soft armour might be a more affordable and lightweight option for you.
Hard Armour
Ballistic plates, otherwise known as hard armour, are much thicker and heavier than kevlar and are often made from ballistic steel, ceramic or polyethylene. Ceramic and polyethylene plates are the modern advantageous design over steel, as they are much lighter and provide better absorption of bullet fragments than steel.
Some ballistic plates work in conjunction with soft armour, while others are capable of working alone and are known as stand-alone plates. With so many options available, you’ll need to do specific research into various brands to determine which is most suitable for you in terms of cost, weight and stopping potential. If you are at risk of taking a rifle round to your plate carrier, then hard armour is what you need.

Tip: multi-curve plates provide the best fit as they are contoured along two or more dimensions to fit your torso better.
Also, when using hard and soft armour together, it is important that the soft armour sits closest to your body, while the hard armour will face outwards making first contact with any incoming projectiles.
Magazine Placement On Your Plate Carrier [or Battle Belt]
When it comes to magazine placement, we need to consider spare magazines for both your primary weapon system; typically a semi-automatic rifle of some sort, and your sidearm.
Rifle Magazine Placement
- The ideal placement for your primary rifle magazines is on your plate carrier’s front panel, and the 4 or 8 o’clock position of your battle belt. Although it is common practice to place these on the plate carrier’s sides, these are often difficult to reach from this position.
- Also, I’ve seen many shooters double-stacking magazines on their front pouches. If you wish to experiment with this loadout, pay specific attention to your body position and exposure when firing from prone, and make sure that it works for you before committing to the double-stack. I have used double-stack magazines in the past, but my personal modern preference is to single-stack and create a lower profile.
- The ideal number of spare magazines that you should carry – in my opinion – is six. This allows for a total number of seven magazines including that which is fitted to your rifle. A seven mag setup gives you between 175 and 210 rifle rounds in total, depending on your magazine’s cartridge capacity of course.
- It is also vitally important to ensure that the majority of your magazines are properly retained in their pouches and are not loosely fitted; the last thing you want is for kit to go missing when crawling around in the dirt. However, your first “go to” magazine during a speed reload should be readily available with as little retention as possible. This is the mag which you can reach and remove in the least amount of time. The HSGI Taco and G-Code Scorpion mag pouches are excellent rapid-access options.
- Finally, make sure that your magazines are orientated correctly. The preferred method is for magazines to enter the pouch cartridge-first, as seen in the image below.

Pistol Magazine Placement
- Spare pistol magazines are typically stored on the 3 or 9 o’clock position of your battle belt, or attached to the outside of your spare rifle mag pouches on the left or right side of your plate carrier.
- I have seen tons of incorrectly stored/placed magazines in my time. Make sure that they are correctly orientated for smooth and easy operation [or indexing] from the pouch directly into the firearms magazine housing; no re-orientation should take place once the magazine has been indexed.
As a right-handed shooter, my magazine placement is as follows:
| Magazine | Placement | Cartridge Orientation |
| 1x Loaded Rifle Mag | In Rifle | Loaded |
| 3x Quick Draw Rifle Mags | Plate Carrier, Front Panel | Bullets Point to Left |
| 2x Quick Draw Rifle Mags | Battle Belt, 7 to 8 O’clock | Bullets Point to Rear/Right |
| 1x Spare Rifle Mag | Tactical Trouser Pocket, Left Leg | Bullets Point to Left |
| 1x Loaded Pistol Mag | In Pistol | Loaded |
| 2x Spare Pistol Mags | Battle Belt, 9 O’clock | Bullets Point Forward |
Med Kit [IFAK] & Tourniquet Placement
Your IFAK, or Individual First Aid Kit, needs to be easily accessible to you when set up for individual use. It is common for military and law enforcement personnel to place med kits on the rear of their plate carriers for access by fellow team members. This is no use when you may not have a trained team medic nearby. You should therefore be able to gain access to our own med kit without any assistance.
My recommended med kit placement is either at the rear (or 6 o’clock position) of your battle belt, or on the side panel of your plate carrier; typically on the same side as your non-shooting hand.
Tip: there are many small and compact med pouches available that are made by reputable manufacturers. Select one which has a removable inner. This gives you the ability to remove the entire contents for ease of use while the pouch remains firmly attached.
For a detailed article on IFAK contents and how to use one, click here.
Tourniquets
The correct number of tourniquets to carry is a topic of large debate. However for obvious reasons, more is always better. Many will agree that the ideal number is four; one for each of your extremities. I would recommend at least two that form part of your mission critical gear, and an extra two placed in sleeve pockets or a grab bag. These can also be substituted with another form of haemorrhage control as your desire.
I have tried and tested tourniquets in a number of various places around my gear, and the two positions that I have come to settle on (in addition to the spares kept in my grab bag) are as follows:
- My first tourniquet is attached to my battle belt in a tourniquet pouch; within easy reach of both arms. This tourniquet sits just forward of my pistol.
- My second tourniquet sits beneath my 3 rifle magazines on the front panel of my plate carrier. It is secured with 1/8″ shock cord for easy removal with either hand.
Tip: always fold, prep and store your tourniquet for one-handed use, and do not buy cheap, generic tourniquets.
Placement of Remaining Gear
Now that you have fitted your magazines and medical gear, we need to find places to attach everything else.
- Sidearm – your pistol should be placed where it is easily accessible, and nothing should interfere with your draw. I do not recommend attaching a pistol directly to your plate carrier, but rather to find a spot on your battle belt, or to use a high-quality drop leg holster. My pistol holster fits securely to my battle belt between the 3 and 4 o’clock position.
- HAM Radio – the two-way UHF/VHF radio certainly does fall under “mission critical” gear, and must not be neglected. It is important to train yourself in operation, troubleshooting and voice procedures, and keep all useful frequencies committed to memory or laminated and secured on your person at all times. My radio is primarily secured to my plate carrier on the right-hand side, to the 2.30 o’clock position. This keeps the left-hand area free allowing for less interference when drawing pistol/rifle magazines from a belt, or for an IFAK placement.
- Knife – everyone knows that you can’t go without a knife. Whether it be an inconspicuous folding knife/multitool or a big old fighting knife, there’s always gotta be a knife. Where-ever you decide to place it, always make sure that it is easily and rapidly accessible. This may be lifesaving in certain scenarios, such as cutting yourself or a bystander free from a seat belt.
- Flashlight – a good place to store your flashlight would be alongside your HAM radio, either attached to your plate carrier or fastened to your battle belt. My flashlight attaches to my belt order at the 9 o’clock position. And never forget the rule of flashlights: two is one and one is none. If you already have a weapon mounted light, doesn’t matter. Don’t skip over the flashlight.
But What About the Dump Pouch, Do You Really Need One?
Dump pouches are considered to be invaluable pieces of kit to many shooters out there; I have a few friends and colleagues who swear by them. As for my own attitude towards dump pouches – this has changed over the years.
A Dump Pouch is an attachment used to store or retain empty magazines in a hurry.
I have used most types of dump pouches from drop-leg variants to compact and even those which stack on top of magazine pouches, finding the compact folding dump pouch to be my favourite. This was until I realised that I could make better use of the space with something else; an extra rifle mag, flashlight, or an extra tourniquet for example. For this reason I no longer use one.
So what do I do to retain my magazines?
- Tactical Reload – when conducting a tactical reload, my empty or partially full magazine goes straight back into an empty pouch.
- Speed Reload – when carrying out a speed reload (or combat reload), my empty mag typically falls into the dirt. If I feel that I need to retain the magazine, then it gets stored either in my left-leg’s trouser pocket or back into an empty magazine pouch.
If you decide to retain the dump pouch, it often sits well to your rear left/right side and may be stacked on top of your spare rifle magazine pouch.
Drop-Down Utility Pouches or “Danglers”

Drop-down utility pouches or Danglers have become extremely popular in recent years. They attach to/ hang under the front flap of most plate carriers, and secure quickly via Velcro.
The reason I am pro-dangler, is that they offer ample extra storage space, while allowing to you retain a low profile without any interference towards your firing positions; specifically the kneeling and prone.
Plate Carrier Sizing & Fitment
This is where most people go wrong. The plate carrier is designed to cover and protect your vital organs (heart, lungs, kidneys, liver and spleen), and not your entire torso. For this reason it needs to be fitted properly, and in doings so, you’ll end up with a comfortable and manoeuvrable plate carrier system.
The general rule of thumb when sizing a plate carrier is as follows:
- The Front Plate Pouch – should sit at the width of two fingers beneath where your collarbones meet, just above the bodies sternal angle. This is higher than what most people would expect.
- The Rear Plate Pouch – should sit two vertebrae (approx. 1-inch or 2.5cm) beneath your vertebra prominens; an inch beneath the 7th cervical vertebra characterised by a prominent spinous process which can be felt at the base of the rear neck.

While setting your front and rear plate placement, adjust the shoulder straps and side straps (or cummerbund) giving enough slack to guarantee comfortable movement and breathing while the carrier stays snug on the body.
It is important to note that not all plate carriers are accepting of all plate brands and sizes on the market. Having plates that are too small will not only offer less protection, but may also move freely inside the carrier and cause certain areas to sag. Too large, and they won’t fit. A little research will ensure good pairing.
What is MOLLE, And How to Use It
MOLLE is the acronym for Modular Lightweight Load-carrying Equipment, and is the webbing system seen on most modern plate carriers. I’ve seen inexperienced shooters use MOLLE incorrectly more times than I care to admit, so make sure that you know how to faultlessly thread MOLLE before considering your setup ready for testing. The correct method can be seen in the video below.
When used incorrectly, MOLLE pouches will wobble and rattle, and may fall free or tear away even under light field use.
Plate Carrier Tips & Tricks
Our interactive plate carrier setup offers tips & tricks that you may find useful. Move your mouse curser or use your finger to press & drag over the image displayed below. You may zoom if you feel the need. Areas will highlight when interactive content is available. A quick tap of your curser/finger will open an information panel. Press the “x” or tap outside of the screen to exit the panel and continue browsing.

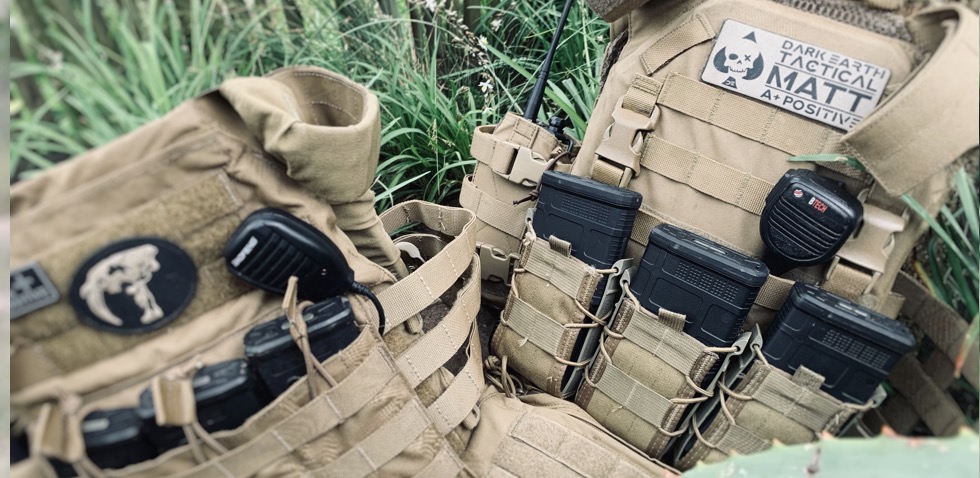
ID Panel
The Identification Panel has a number of cool & sometimes essential uses. Here is a list of some ideas and tips to help you get started.
- Use it as a forward facing display of your favourite morale patch (this one is obvious I know 🤪 )
- A place to display your country’s flag or your unit/regiment logo
- Your blood group and any important medical allergies should go here, this one is vital
- Consider wrapping 2 or 3 individual iodine/water purification tabs in foil, and securing them behind a morale patch as a means of purifying water should it become scarce
- If radio speaker mic’s or PTT’s lose functionality of their attachment clip (they sometime break), secure a piece of hook velcro to the back of your speaker mic and secure it to the ID panel
Shoulder Pads
- These can be removed for a more low-profile carrier, particularly when used with a backpack or grab bag
- If you decide to keep them attached, you may use the loops or padding to secure & conceal drinking tubes and comms wires
Drag Handle
- Test your drag (or grab) handle by asking a teammate to vigorously drag you around during training. Also, drag someone around yourself; simulate an immobilised casualty and learn from the experience. This allows you to get a feel as to what what its like being dragged in a plate carrier, whilst also giving you an idea as to the high levels of stamina required to do so effectively
- This process will concurrently test the quality and stitching of your setup, ensuring that it will withstand arduous use when needed
- Don’t worry too much about this breaking; if you’ve purchasing a high-quality system it will endure, and if not, then maybe it’s time for an upgrade
Magazine Pouches
- A low-profile setup will benefit from 3x universal mag pouches attached to the carrier’s front panel
- When selecting pouches, stitching is far more durable than plastic systems containing screws. These have a tendency to come lose through arduous use
- Modern universal pouches allow for a variety of magazines – AR-15, AR-10, AK-47, etc – without having to change the setup
- Double-stacking magazines adds weight, and raises the profile of the carrier which creates additional exposure when firing from prone, while also providing more area to snag on seat-belts and other items when operating from vehicles/amongst thick vegetation. I only recommend double-stacking magazines if your role requires you to do so
- Make sure all magazines are properly retained and fit snug. Some physical training/hand-stand press-ups in full kit will be a good indication of this
- The HSGI Taco and G-Code Scorpion mag pouches are good examples of rapid-access universal pouches
- Make sure your magazines are always orientated correctly. The preferred method is for magazines to enter the pouch cartridge-first, with bullets pointing towards your weak hand. This allows the magazine to be properly indexed for a smooth reload
Back Panel
- Unless your role requires you to do so, avoid adding pouches or permanent packs/hydration bladders to your back. This only makes things difficult when carrying heavy loads or grab bags later on
- Imagine trying to fit a 72-hour grab-bag to your back with grenades and IFAK pouches permanently attached. These setups only work for certain roles, and those operators already know what kind of setup they require, so keep the back free from permanent MOLLE attachments
- Rather use should straps for compact hydration packs and bug-out bags, otherwise have a look at the Hayley Strategic Flatpack, which can be emptied and compressed when not in use
HAM Radio
- A two-way UHF/VHF radio must not be neglected
- It is important to train yourself in operation, troubleshooting and voice procedures, and keep all useful frequencies committed to memory or laminated and secured on your person at all times
- The left or right side of your carrier beneath and just forward of the arm-pit is an ideal location for your radio. Consider placing it on your strong-arm side, as this provides less interference on the opposite side when drawing pistol/rifle magazines from a battle belt
- Avoid attaching radios to MOLLE loops via radio clips. Under arduous use, these more than often tear free and fall to the ground. Instead, use a pouch that offers proper retention
- I prefer securely attaching my radio to the inside of my plate carriers cummerbund on my right side. I place a soft piece of 5-10mm foam against the radio control panel to prevent accidental operation should the radio’s lock feature disengage
The Cummerbund
- The cummerbund wraps around the body and allows for sizing adjustments which create a snug fit
- Quick release buckles, standard buckles/clips and velcro (hook and loop) panels are most common
- Once the place carrier is correctly adjusted, it makes things easier leaving one side permanently fastened – typically the side which accommodates your HAM radio. This allows you to slip your arm through the carrier and buckle up only one-single side, resulting in less interference with radio wires and speaker mic’s
- Plate carriers must be correctly sized and fitted allowing them to cover and protect the human vital organs
- The front plate should sit at the width of two fingers beneath where your collarbones meet, just above the bodies sternal angle. This is higher than what most people would expect
- The rear pouch should sit two vertebrae (approx. 1-inch or 2.5cm) beneath your vertebra prominens; an inch beneath the 7th cervical vertebra characterised by a prominent spinous process which can be felt at the base of the rear neck
Sizing Panel
- Many plate carriers have an adjustment/sizing panel at the rear. This conceals a series of adjustable shock-cord settings which loosen or tighten the cummerbund
- Always make sure the plate carrier is securely fitted and correctly sized during your initial setup. It should fit snug enough so that it doesn’t move freely when running or exercising, but not so tight as to constrict the chest and put any unwanted strain on the lungs
- The velcro flap/panel which conceals the adjustment area works well in securing and hiding radio wires when needing to run them along the back of the carrier and up towards the ear
Ballistic Plates & Soft Armour
- Some ballistic plates work in conjunction with soft armour, while others are capable of working alone and are known as stand-alone plates
- When using hard and soft armour together, it is important that the soft armour sits closest to your body, while the hard armour will face outwards making first contact with any incoming projectiles
- Multi-curve plates provide the best fit as they are contoured along two or more dimensions to fit your torso better
Breathable Padding
- Each plate carrier has its own type/design of breathable inner padding
- Wash or soak this area with clean water every so often or after heavy use, as this will remove sweat, salt particles and bacteria, increasing longevity of the carrier
- If used for extended durations, wear and under-armour layer to keep the body cool and prevent skin inflammation and blistering, which may otherwise form from repetitive rubbing of the carrier against your skin (cotton t-shirts become wet and crease, which will aggravate hot spots after prolonged use)
MOLLE
- MOLLE – or modular light-weight load-carrying equipment – has rows of heavy-duty nylon fabric called PALS (pouch attachment ladder system) which are stitched onto or laser cut into the carrier, providing an attachment point for pouches and gear
- It is vital that MOLLE is weaved through the PALS when fitting pouches or accessories onto your plate carrier. This means that when fitting gear to your carrier, you must alternate weaving between the webbing of both the pouch and your plate carrier, creating a super-secure bond
And Finally, the Test & Adjust Phase
I cannot stress enough how important it is to rigorously test your plate carrier and belt order before settling on a setup. You may have spent hours rearranging and adjusting your equipment in the comfort of your living room, narrowing it down to what may seem to be a flawless setup, only to find that it falls apart or doesn’t work when running around on the range under stress.
My advice is to test your kit in number of outdoor scenarios, and then adjust where necessary.
- Test it out with a rifle sling and a bug-out bag
- Do some field firing and crawling around in the prone position
- Get in and out of vehicles or tight spaces
- Have a friend or team member drag you by the carriers grab handle
- Do some mag reloads, and practice a few simulated medical scenarios that require quick access to your tourniquets and IFAK
Properly testing your kit is the only way that you will find any flaws and be able to correct them. It will also ensure that your kit is durable and robust enough to meet your demands.
And lastly, don’t be temped to overdo it by adding fancy but unnecessary kit to your plate carrier and belt order. Keep it minimalistic in design, and place any extra “nice to haves” into your grab bag.
If you feel that you have some valuable info to share with us, please leave a comment below, as we’d love to hear from you. And if you have any friends or colleagues who share your interest in tactical gear and preparation, please share this article with them.
4 thoughts on “How to Setup Your Plate Carrier [or Ballistic Vest] For Individual Use”
Extremely helpful, changing my set up and way of thinking because of this article.
Thanks for sharing this useful article. Can I use a plate carrier as a weight vest?