Long range shooting can become frustrating, particularly when you are doing things to the best of your knowledge, but they still aren’t going your way. Today I am going to share 10 steps that are often overlooked amongst novice (and even intermediate) shooters. I have noticed first hand how these steps are more-often neglected than practiced, and how they have the ability to improve long range success. So without further ado, let’s answer the question: what may be causing you to miss those longer shots?
There are many factors that are crucial for long range success that don’t even apply at closer distances. This is because bullets slow down at an alarming rate the further they travel. The following 10 steps may increase awareness, helping to reduce the number of misses over longer distances.
- Use a scope [bubble] level
- Increase muzzle velocity consistency
- Understand Minute of Angle
- Use G7 Ballistic Coefficient
- Ensure a consistent cheek weld
- Update your altitude pressure
- Monitor ambient temperature
- Make use of artificial support
- Check your parallax
- Trust your wind calls
Below we will discuss each step in more detail, but if you still aren’t satisfied, feel free to leave us a comment below.
1. Level That Scope [Use a Bubble Level]
A bubble level for your scope is considered to be an essential item when you intend on shooting long range. Without one, you are very likely to experience an inconsistent horizontal displacement of your bullet in relation to your point of aim. This is known as cant error.

A 3-degree cant for example, which may be unnoticeable to the naked eye, can cause a bullet to drift as much as 40cm or 15-inches when taking a shot from 800 meters. This error is eliminated by using a scope level.
So if you’re not using one, I highly recommend exploring this option. You can read our following blog for more info on this: Do I Need a Bubble Level on my Rifle Scope?
2. Monitor Standard Deviation [Muzzle Velocity]
Variations in muzzle velocity should be kept to a minimum. This requires high quality ammunition, or high quality and consist measurements in propellant charges during handloading.
Standard Deviation can be described as a measurement that shows how much muzzle velocity variation exists between shots. For long range accuracy, standard deviation should be as low as possible.
Cartridges which experience inconsistent velocities, let’s say around 30 to 40fps between shots, are still capable of producing superb groupings at closer distances and even out to around 300 meters. However as distance grows, group sizes will increase and the shooter will struggle to obtain a consistent point of impact.
Ideally you want to witness duplicate velocities when measuring muzzle velocity through a chronograph, with a maximum variation of around 5 to 6 fps between shots when long range accuracy is desired.
For more info read: The Long Range Effects of Muzzle Velocity Variation
3. MOA Grows in Proportion With Range
Although this one doesn’t necessarily improve long range shooting, it is still an important concept to understand. I have had novice shooters ask me before why they can’t hit MOA-sized targets at various distances, typically exceeding 300 meters. The answer is often because they don’t understand that MOA (or minute of angle) grows in proportion with range.
Now this one may seem obvious to many, but the concept is fairly simple: MOA does in fact grow proportionally with range. This means that while 1 MOA equals 29mm at 100 meters, or 1-inch at 100 yards, it grows in line with distance, as seen in the following chart.
| Distance (meters) | MOA Size (cm) | Distance (yards) | MOA Size (inches) |
| 100 | 2.9cm | 100 | 1-inch |
| 200 | 5.8cm | 200 | 2-inches |
| 300 | 8.7cm | 300 | 3-inches |
| 400 | 11.6cm | 400 | 4-inches |
| 500 | 14.5cm | 500 | 5-inches |
| 600 | 17.4cm | 600 | 6-inches |
| 700 | 20.3cm | 700 | 7-inches |
| 800 | 23.2cm | 800 | 8-inches |
| 900 | 26.1cm | 900 | 9-inches |
| 1000 | 29cm | 1000 | 10-inches |
4. Use The G7 Ballistic Coefficient
Anyone who shoots long range will understand the importance of using a ballistics calculator to determine trajectory and other external factors. But not all are aware of the difference between the G1 and G7 ballistic coefficient.

While the G1 is more suitable for flat-based bullets, it is the most common BC model used across the board. The G7 however is more suitable for boat-tails, and will provide a more accurate trajectory when used for long range. So where possible, always use G7 for ballistic coefficient.
Tip: make sure to change your drag-function or native drag model between G1 or G7 depending on which model you use.
5. Ensure a Consistent Cheek Weld
This is often one of the biggest errors I notice amongst hunters and novice shooters; having an inconsistent cheek placement on the stock. While it won’t cause severe misses, it most often displaces the shooter’s zero, causing shot groups to form in other areas away from the point of aim.
The solution to this error is to either use an adjustable rifle stock or chassis, or tailor your stock using DIY methods, providing the perfect length of pull and cheek weld that will allow your head-position to sit in the exact same spot at all times. This ensures a consistent eye relief and sight alignment, which forms a vital part of our marksmanship fundamentals.
6. Update Your Altitude Pressure
Altitude and pressure form a crucial part of external ballistics and bullet trajectory, and should be monitored by long range shooters and accounted for throughout the day.
At higher altitudes, a shooter can expect lower air pressure, meaning that the air is less dense and therefore thinner. The result is less air resistance on the bullet, which means more efficient flight with the ability to shoot further.
When it comes to air pressure in ballistics, we are more concerned with station pressure rather than barometric pressure (or corrected pressure). Station pressure is the reading which must be entered into our ballistics calculator.
Absolute Pressure or Station Pressure – this is the pressure felt or recorded at the spot on which the shooter is taking a reading. It is the actual measurement at the measurement point, and is achieved by using a weather meter or similar device which can record barometric pressure.
There are many factors that can affect pressure on the day. Weather, temperature, humidity, and even diurnal pressure variation, which is an atmospheric tide that causes a maximum and minimum pressure to occur at approximately the same local time each day, are just a few factors that may cause a pressure change in your local area.
For more information read the following blog: The Effects of Altitude and Barometric Pressure on a Bullet During Flight
7. Monitor Ambient Temperature
Temperature has a rather considerable effect on bullet flight, more-so than you may realise. The first effect takes place in the chamber and cartridge itself, known as the internal temperature, while the second is of the air temperature outside, known as the external temperature. As the temperature rises, muzzle velocity increases while air density reduces, producing less drag onto the bullet. This flattens the trajectory, resulting in high hits if compensation is not made.
A temperature increase of only 5°C on the day of shooting is capable of displacing your bullet by up to 20cm (or 8-inches) between shots, while complete seasonal changes may have far more drastic effects on a rifle’s DOPE charts. For this reason, it is vitally important that the long range shooter monitors temperature and compensates for it accordingly.
For more information read the following blog: The Effects of Temperature on Bullet Flight
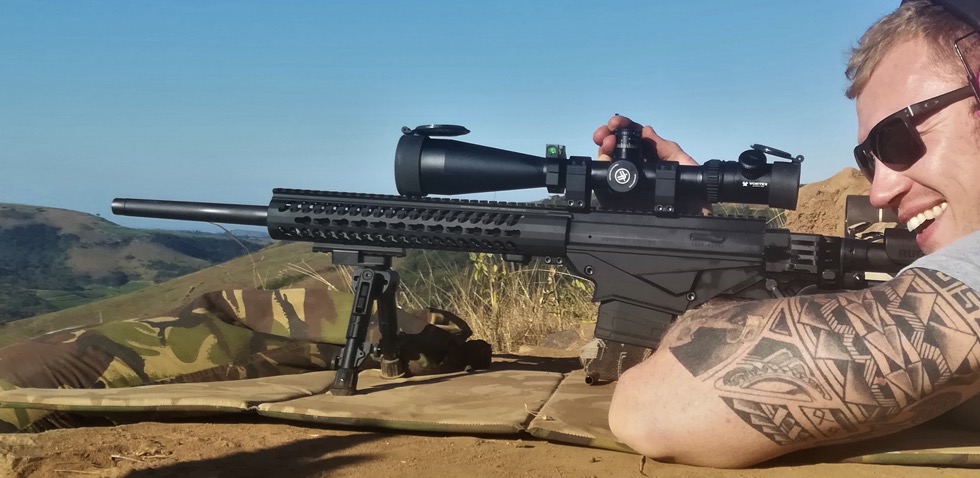
8. Make Use of Artificial Support
For long range precision shooting, artificial support must be used wherever possible. The most stable and portable lightweight support comes in the form of a rifle bipod.
When selecting a bipod, chose one which allows the rifle to sit as close to the ground as possible, while still providing enough ground clearance to shoot comfortably.
The bipod legs should be pressed into the ground where possible, allowing you to “load” the bipod with shoulder pressure. This process allows you to firm up your shooting platform while reducing unwanted jump and promoting accuracy. Oh, and always support the butt of the rifle stock with your off-hand.
9. Check Your Parallax
Many modern scopes come with an adjustable parallax turret, which is a crucial aiming aid when shooting over long distances. By correctly adjusting your scope’s parallax, you are correcting the image by bringing your point of aim (or target) onto the same plane as the reticle. Without this, you would experience a displacement of your shot group very similar to having an incorrect or inconsistent cheek weld.
While there are range indicators on the parallax dial, these should be avoided. Instead, with the rifle solidly supported, move your head from side to side while observing down the riflescope and make sure the reticle does not move on the target. Once this is achieved, parallax is correctly set for your current range.
10. Trust Your Wind Calls
Wind is the second largest effect experienced on a bullet during flight, after gravity. It is also the hardest to account for, often causing huge frustration amongst beginners.
Wind is known as a non-determinable variable, meaning you can never know exactly what it’s doing at every point along the bullet’s flight path. Instead, you can gain experience in reading and accounting for wind, allowing you the best chance of a first round hit when the time comes.
The best advice I can give on wind is to examine what the wind is doing, be bold, and work out a firing solution while trusting your wind call. Many shooters feel that they over-estimate wind, often removing a few clicks just before firing. The only way to gain experience is to trust your calls, dial your scope, engage, observe your bullet’s impact, and learn from your mistakes.
If you enjoyed reading this post and found it useful, don’t keep it to yourself; help us spread the word – select a social share button below. And should you wish to share your thoughts or ask a question, scroll down and leave us a comment 🙂
3 thoughts on “10 Steps to Improving Long Range Shooting [and Consistency]”
I’m surprised you acknowledged the effect of cant on the shot, but didn’t mention having a bipod with a swivel feature.